
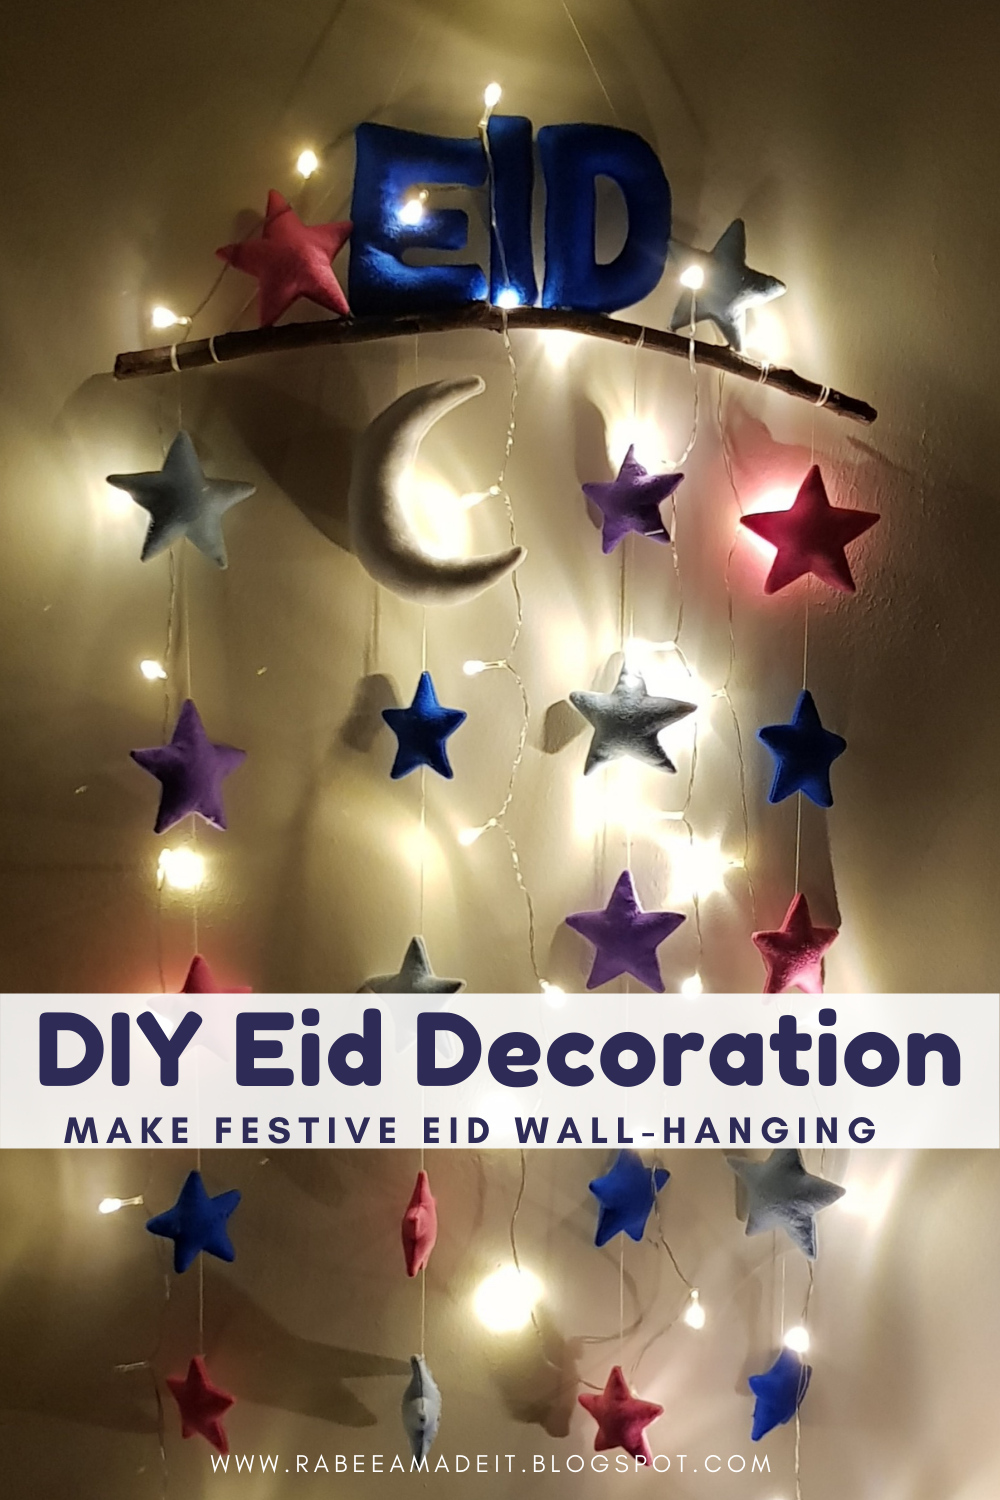
We have never decorated our home on Eid! But this year, I am planning to do so. Being home-bound and away from family and friends, we all need a little cheering up. Specially our children- who have spent a whole year far from their friends at school.
I do not want to go overboard with decorations. Rather my plan is to use whatever craft supplies I have at home and make something that we can use again and again in coming years. It can become part of our Eid decor tradition.
As I am into sewing, I have accumulated loads of fabrics and felt. Over the years, I have stopped working with felt. I still have a good stash. Do not worry, you will not need a lot of it. Most of the supplies you need will be in your home already (if you are into crafts, wink, wink). The only thing I bought was a wooden branch. If you have a tree nearby, you can get one thick twig from it.
Want to start sewing but do not know where to begin with? Start here https://rabeeamadeit.blogspot.com/2021/02/21-sewing-must-haves-supplies-for-beginners.html
Things you will need to make DIY Eid Wall-Décor:
Soft Craft Felt in different colors
Polyester stuffing
Matching threads
Cotton string
Hand-Sewing Needle
Sewing machine
Point turner or chopstick
Stuffing tool or blunt end of paintbrush
Craft scissors
Straight pins
Pen
Stem or wooden dowel
Printed cutout patterns (free download here)
Hot glue gun
Fairy lights
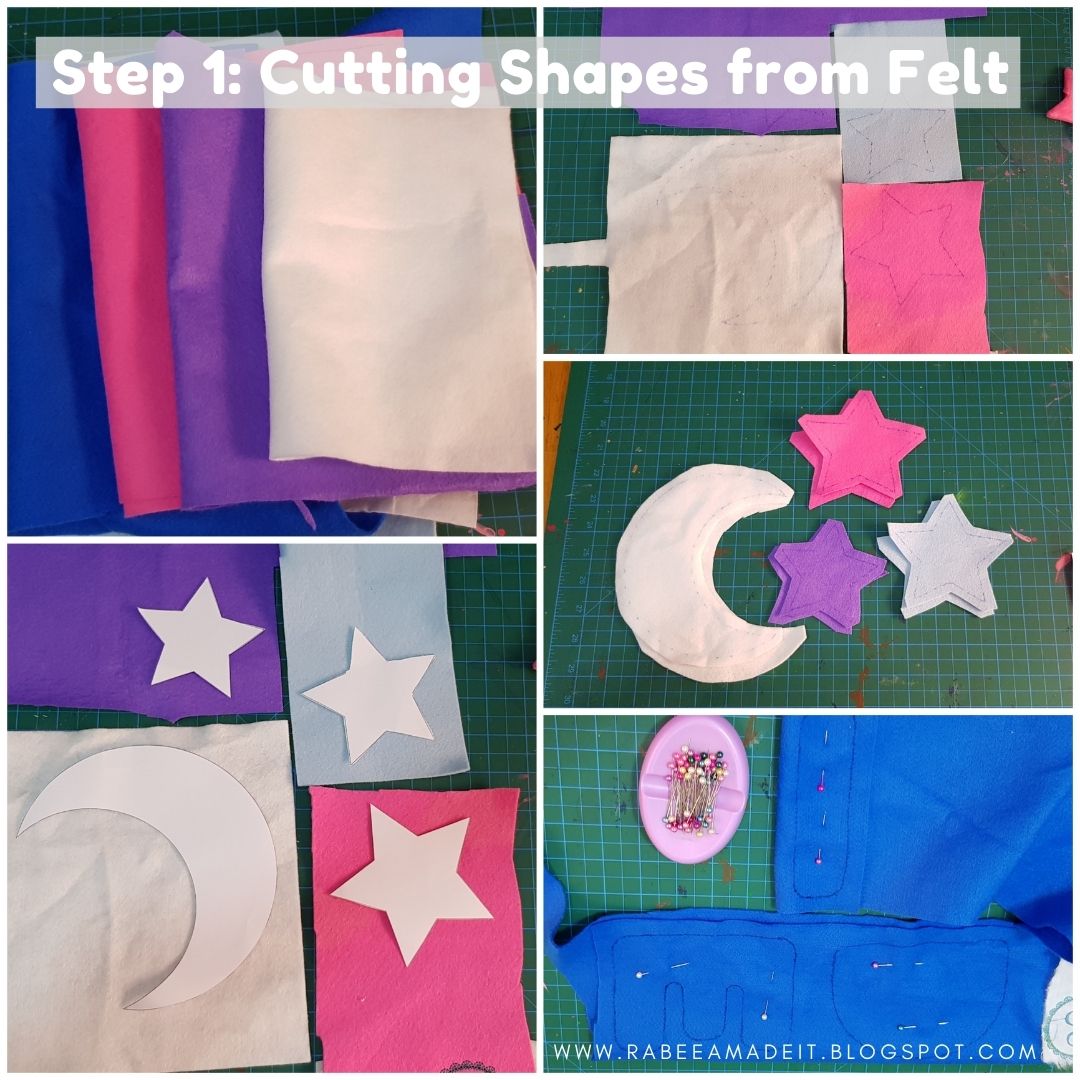
Step 1: Cutting Shapes from Felt
Download your free printable EID pattern cutouts and print on 100% scale.
Cut out all shapes with craft scissors.
On white felt, pin the crescent shape. Draw the outline with a pen. Remove pattern and pin another sheet on its back side. Leave quarter inch space away from marking and cut out crescent from both layers of felt. Keep both pieces pinned so they do not shift or get mixed.
Repeat the same procedure for stars and EID letters. Do not cut inside D. You can cut out as many stars as you want. We need two mirror pieces to make each 3d shape.
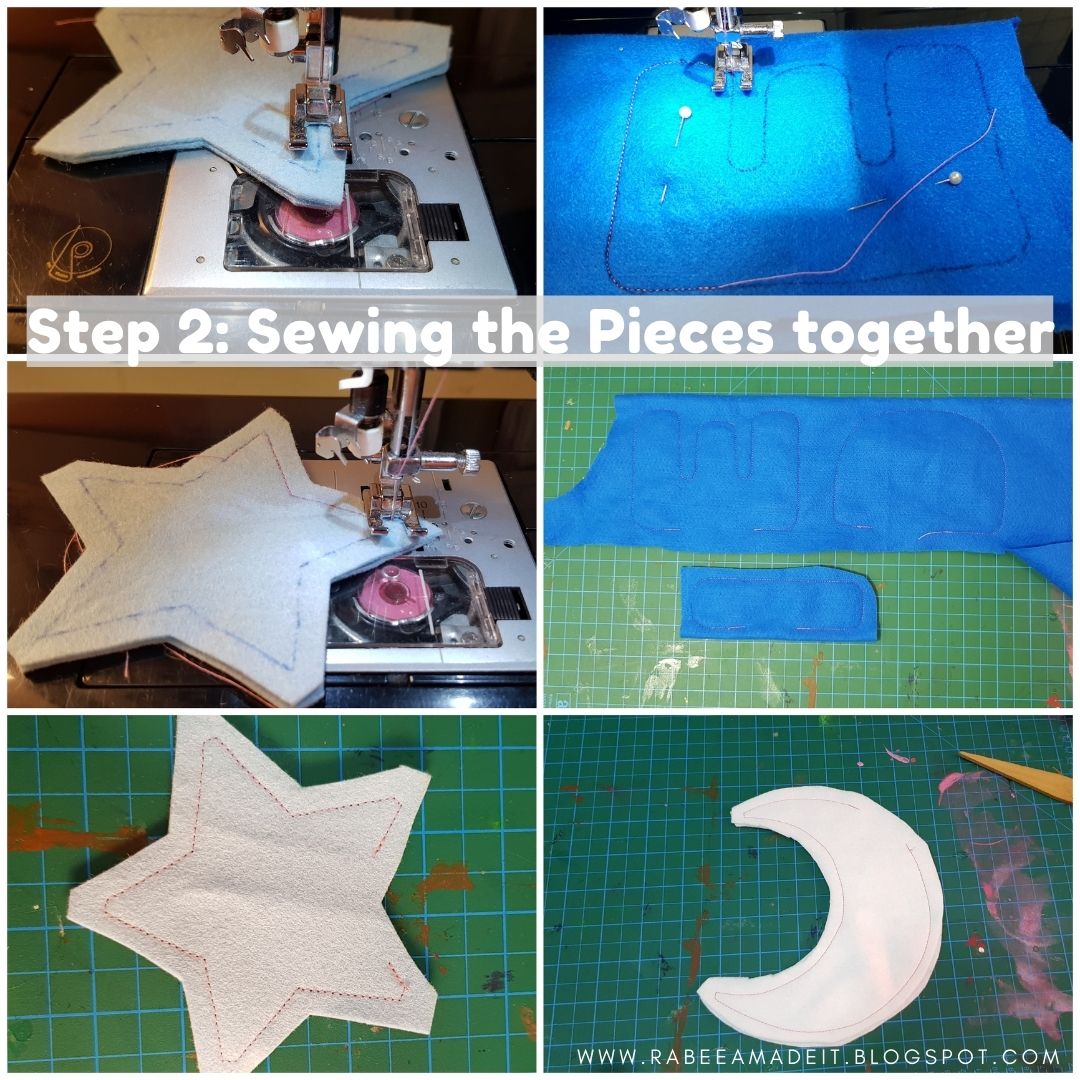
Step 2: Sewing the Pieces Together
Stack all your shapes according to colors so you can stitch them in one go. The markings are your stitching lines.
Start stitching from a straight space, backstitch in beginning to secure. Sew following the marking. Sew a straight stitch in corner for easy turning. Stop 1.5 inches before the starting point and backstitch to secure.
Sew all the pieces the same way and trim thread tails. For stars leave one inner corner unstitched. For letters, leave 2 inches space on left straight side.
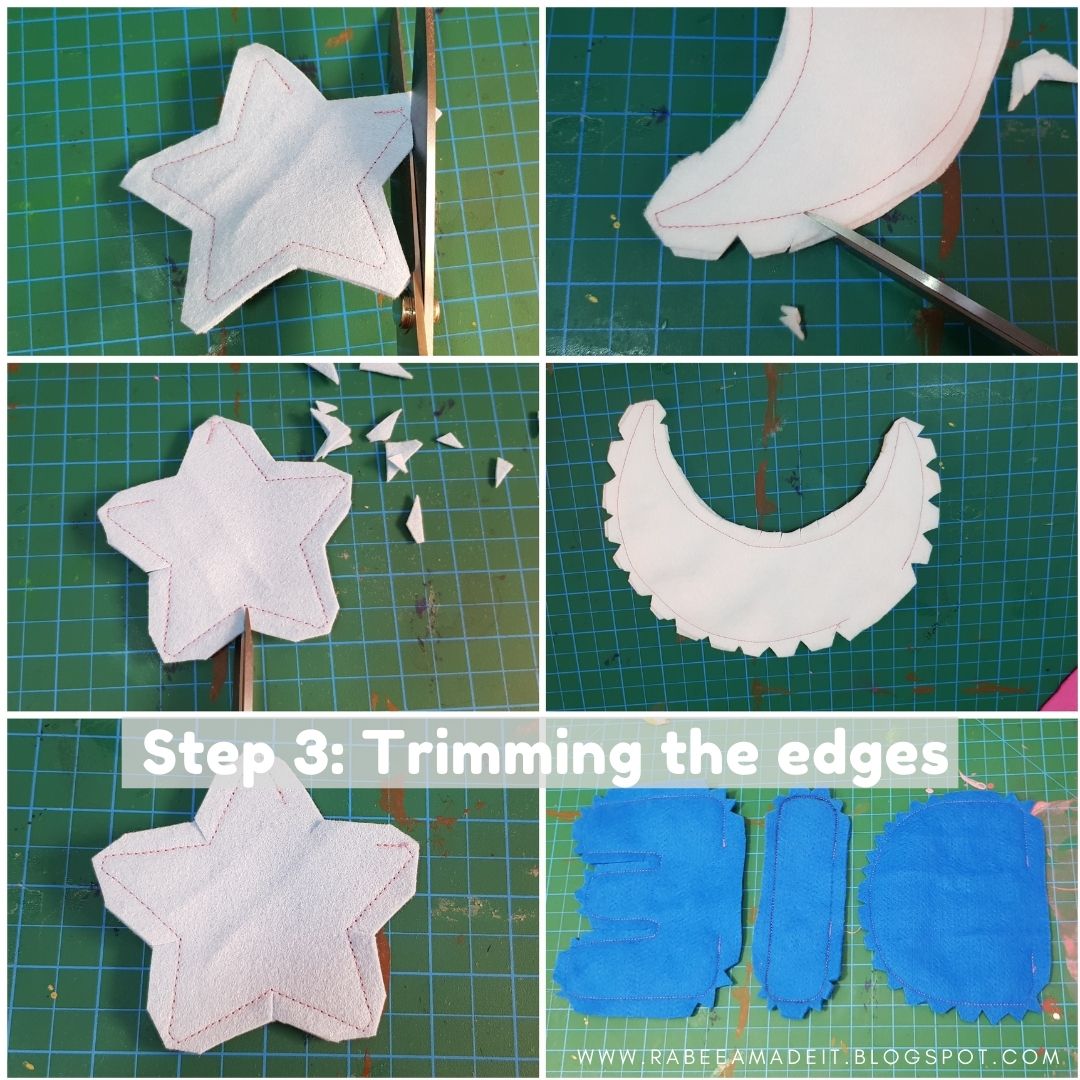
Step 3: Trimming the edges
Before turning the pieces to right side, you will need to trim the corners and clip the curves. This will keep them free from puckers and pinches.
On outside of crescent, snip a triangle into seam allowance, every half inch apart. Be careful to not cut the thread. Do the same for D’s curve.
Snip in inner curve of crescent half inch apart. Snip inner corners of stars as well. Do the same for inner corners of E.
To trim outer corners, cut the extra with two snips so there is very little felt left. Be careful to not cut thread or very close to it.
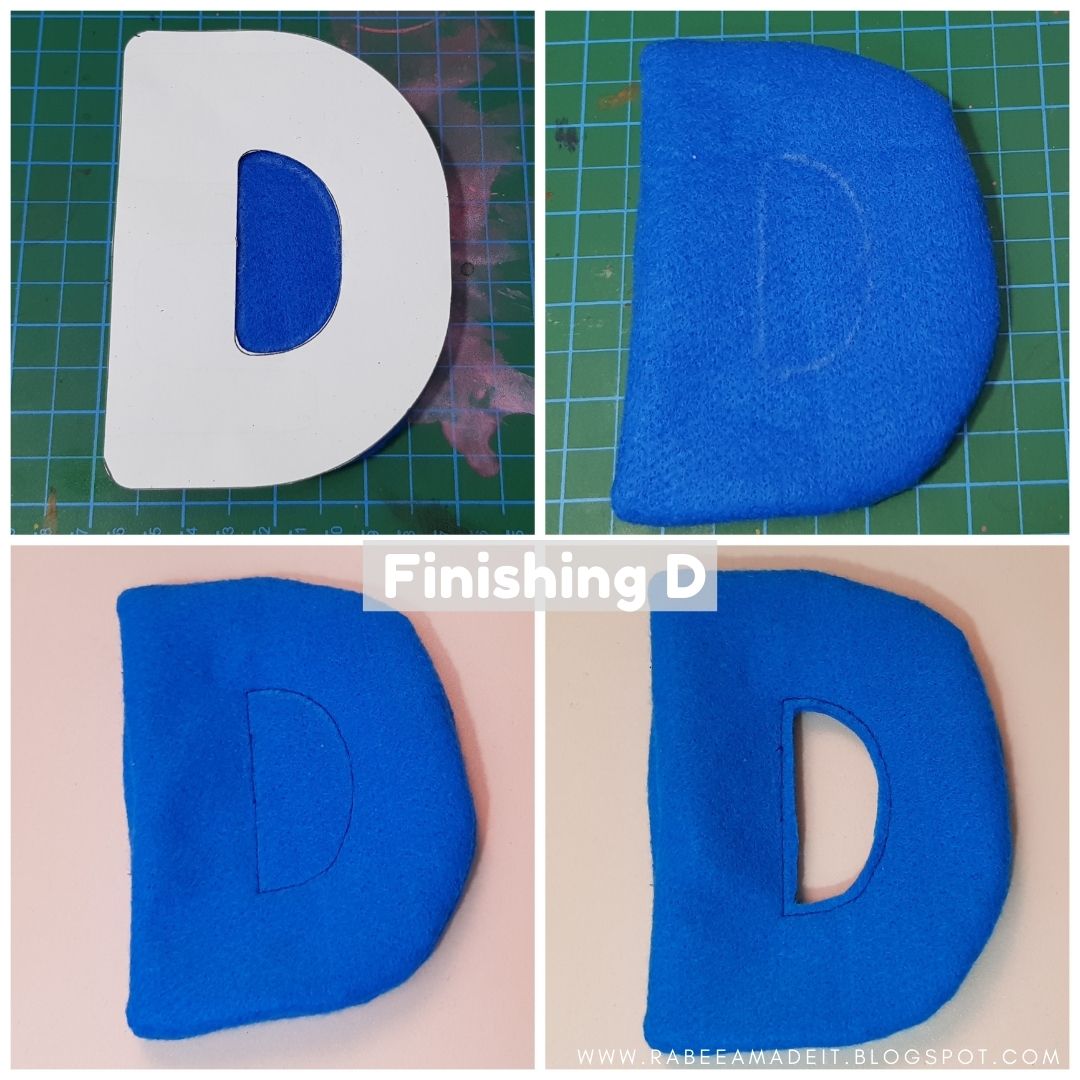
Step 4: Turn and Fill
After turning D to right side, place the printed template on top of it and trace the inner shape on felt. Stitch on marking line and cutout the extra felt from the center. Leave about 1/8 inch inside.
Turn all the shapes inside out. Use pointed end of chopstick or point turner to neaten the corners.
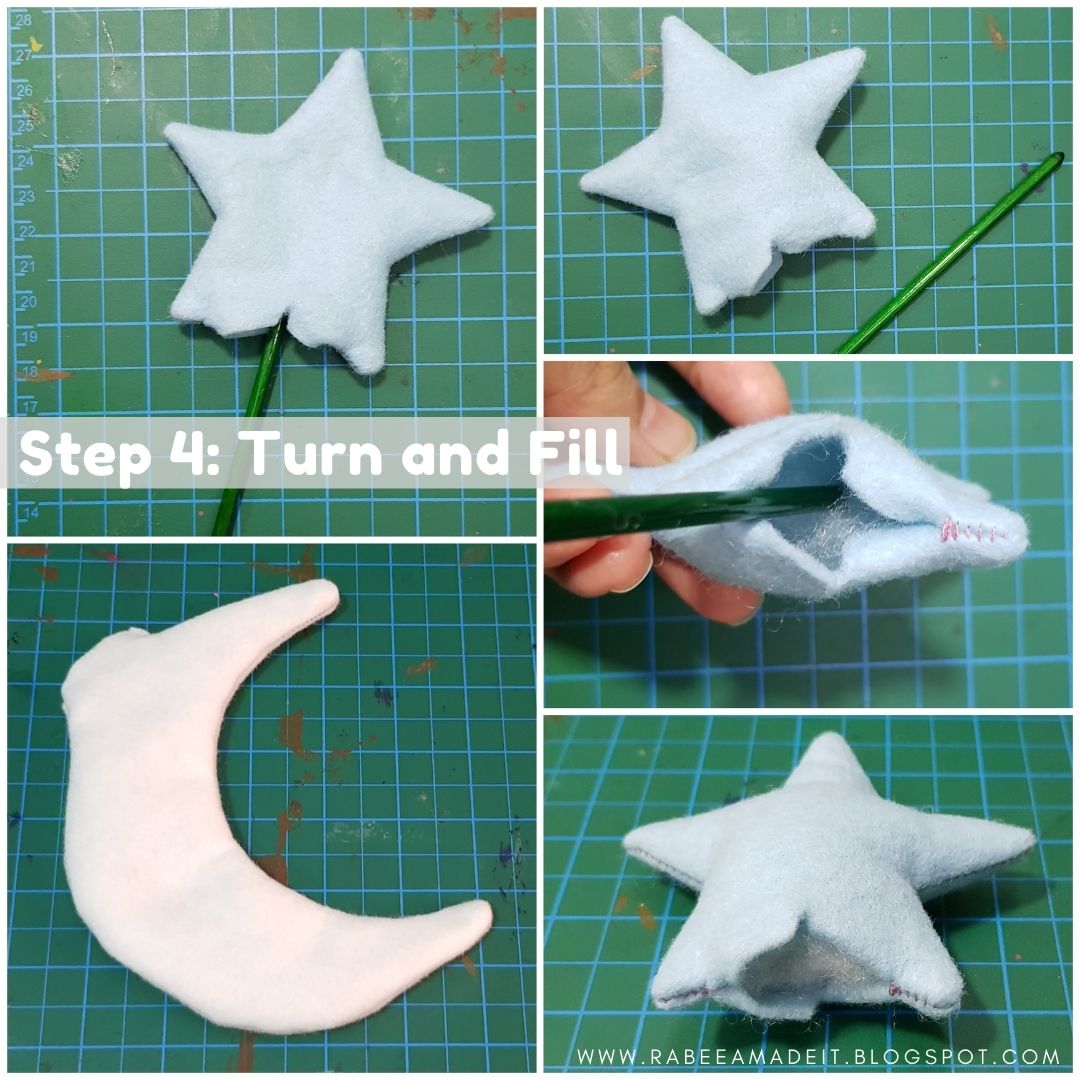
It is time to fill up the shapes with stuffing. First push the stuffing inside the corners. Use stuffing tool. I am using the back end of paintbrush.
Fill them all up to opening. Make sure the shapes are firm to touch.
Step 5: Finish the Shapes
Thread your needle with matching thread. I am using double strands for extra strength. We will close all the openings with ladder stitch.
What is a ladder stitch?
Ladder stitch is made up parallel lines of thread. It is used on toys and footballs to close the openings. When the thread is pulled, the opening closes. That way the stitching is invisible from outside. Here is how to do it.
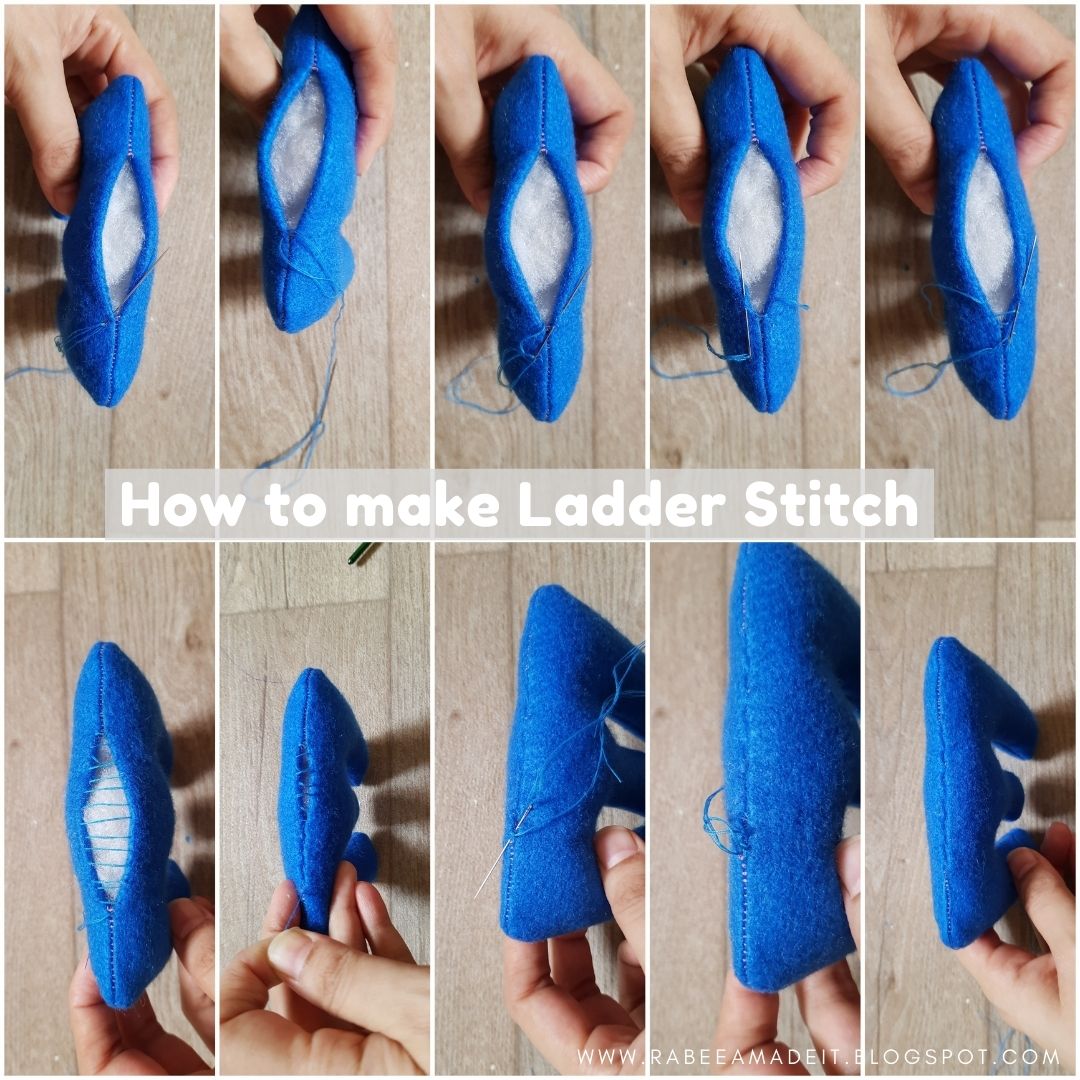
Secure the longer end of thread inside the seam with a knot or passing through the loop. Bring your needle out on front from top and take it inside on the bottom. Bring it outside on bottom working from right to left.
Go to top from outside to inside and bring it outside. Follow the picture for better understanding. When you reach the end of opening, pull the thread. The opening will close.
Secure the thread with few knots in seam and trim tail.
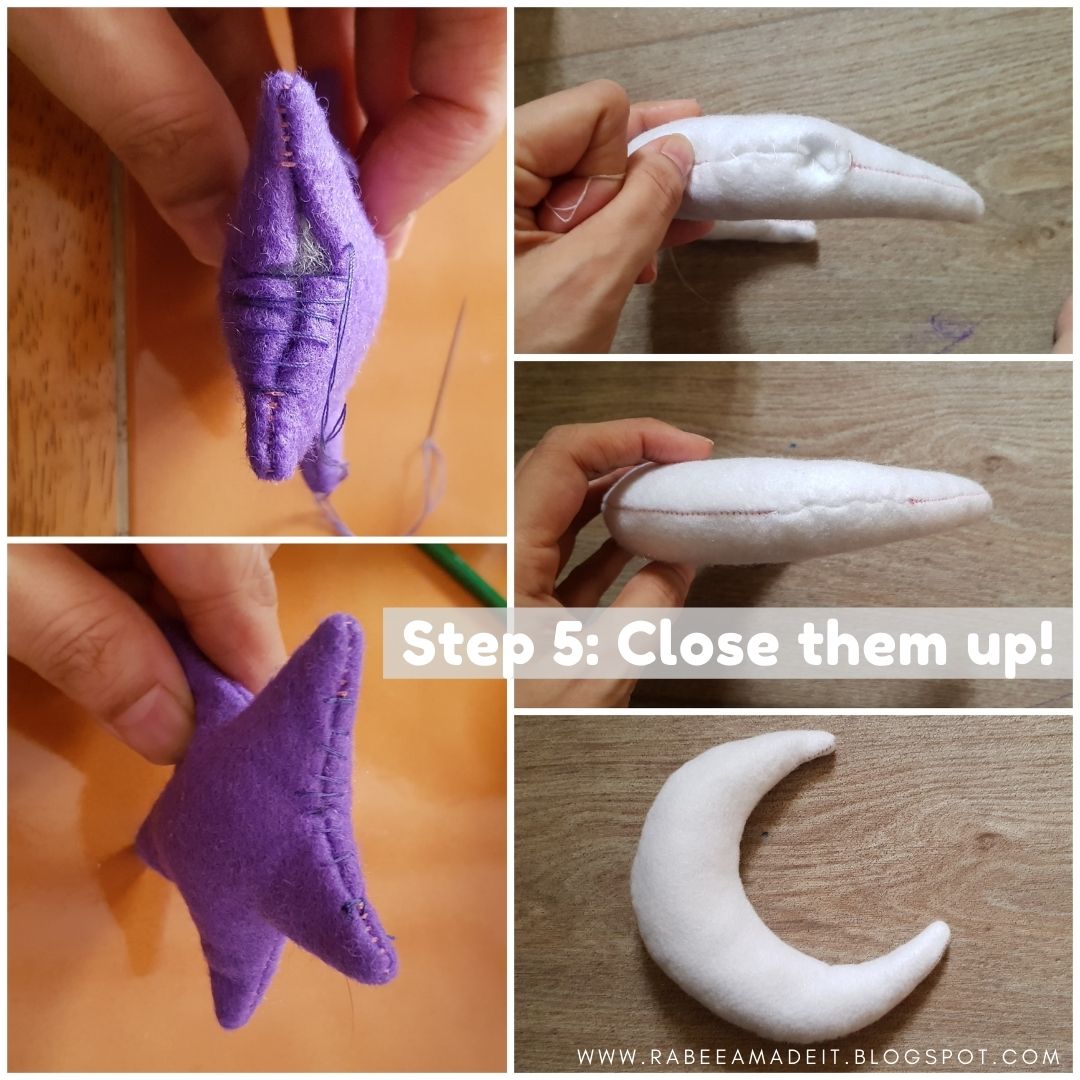
Repeat the same process for all the remaining shapes.
Step 6: Putting it all Together
Place your branch on a flat surface or a table. Arrange letters, crescent and stars in a way you like. Experiment with different arrangements.
When you are happy with it, paste the letters with glue gun on top of branch. Glue one by one and wait for glue to cool down.
To string the stars, thread your needle with a string and secure the end on the last star.
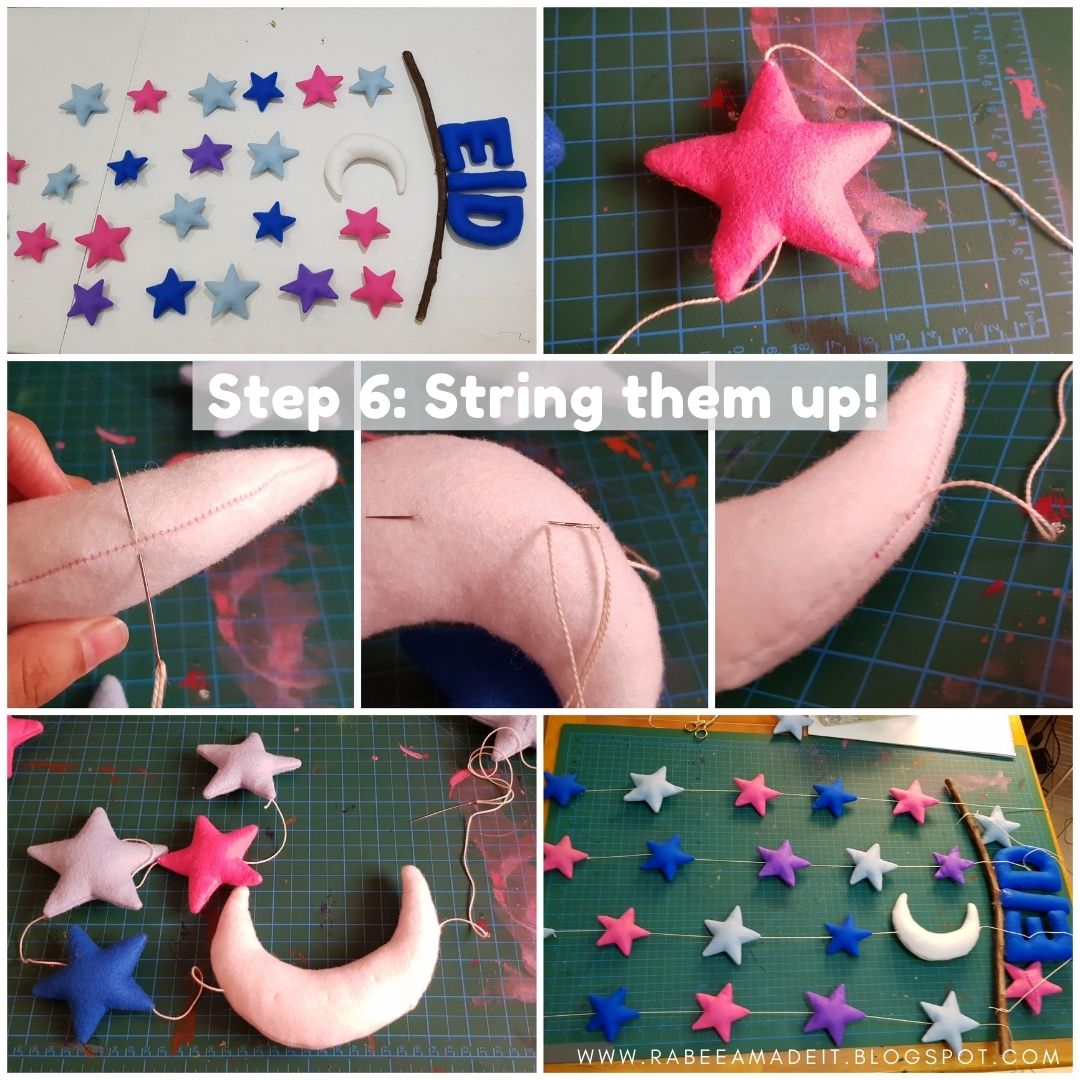
Attach next piece few inches away from it, secure it from bottom and take the needle to upper corner. Make a stitch in between if the needle is too small.
String all the pieces this way and leave the other end of string for tying with branch or gluing.
When all the strings are done, tie those to branch. The one that cannot be attached to branch you can secure it to lettering with needle and few stitches. Put some glue on knots to secure and trim threads.
You will need a string to hang it all on the wall. Secure the two ends of strings by wrapping it few times on branch and then tying few knots.
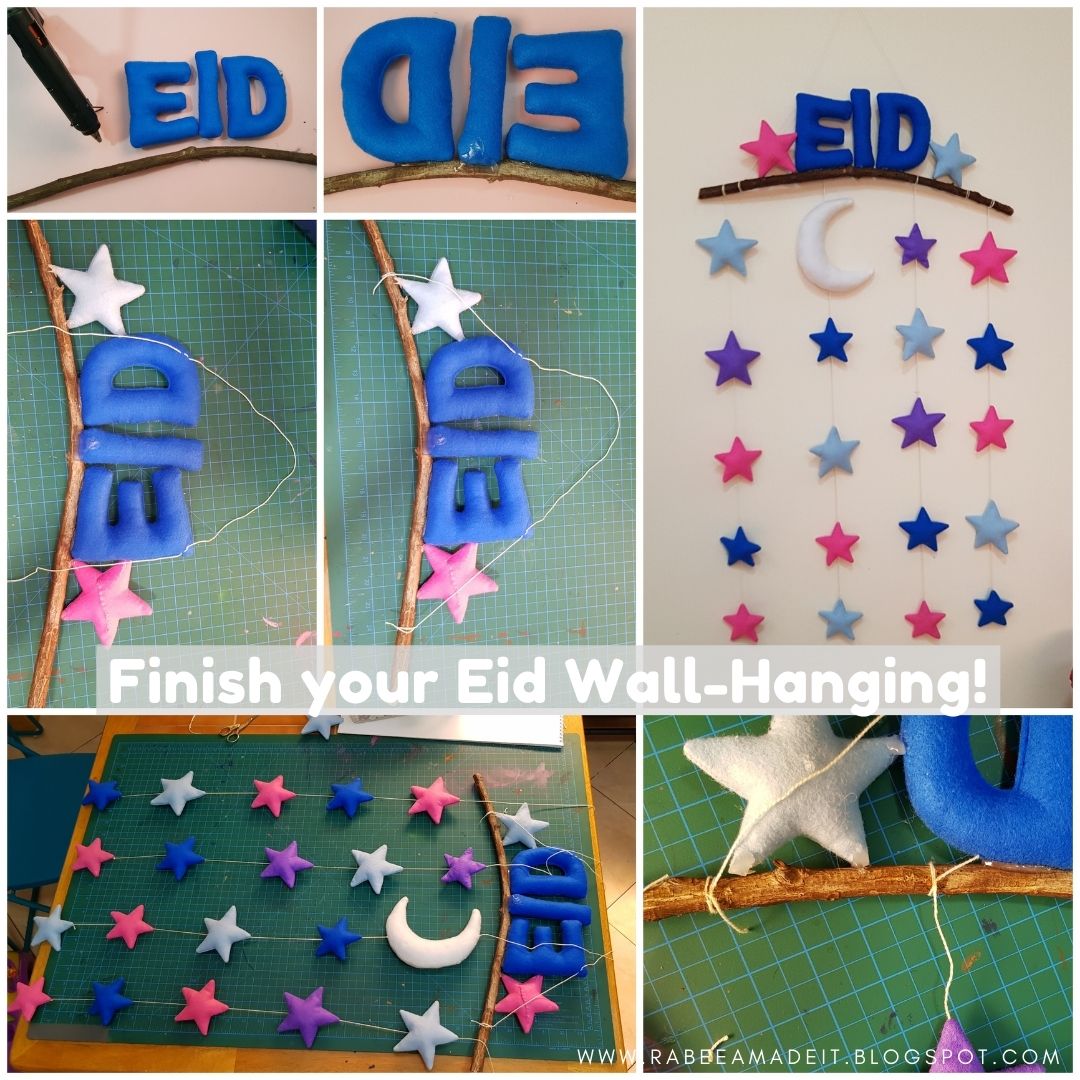
Hang you DIY Eid decor on the wall. Hoorayyyy! Decorate it with some fairy lights and marvel at the beauty that you have created with your hands. You can add pompoms, tassels, bead or decorate it with sequins, flowers, rhinestones, vinyl cutouts and make it one-of-a-kind. It will brighten your Eid days in shaa Allah.
Happy Eid
Rabeea
@rabeeamadeit
Author Bio
Rabeea Danish is a sewing blogger. She lives in Jeddah with her husband and 3 children. She also writes about her journey about motherhood and personal development. Her passion of sewing and crafts has led her start her small business RabeeaMadeIt. She makes and sell children clothing and offer machine embroidery customization services.
MashaAllah. Looks lovely and such a great idea for sewing!
Maa shaa allah I wish I had seen earlier. In shaa Allah will bookmark this for next year
So cool! Thank you
This post is so helpful Masha’Allah. But unfortunately with work, I never get the time to do DIY’s, and I really wanted to decorate for Eid this time.